Tuesday, December 22, 2009

Lucy or Martha ? Who's to blame ?

Every year since I can remember at Christmas time I would watch the Charlie Brown Christmas Special. It's funny how you can watch the same show so many times and not notice something. This year I had to laugh out loud as Lucy told Charlie Brown to get a big, shiny Aluminum Christmas Tree. As we all know Charlie Brown didn't listen to Lucy and bought the infamous " Charlie Brown Tree " .  What if Charlie Brown did listen to Lucy? Would the sparkling Aluminum Christmas Trees be the pathetic, laughed at " Charlie Brown Tree" ? I have to say when I brought home an Aluminum Christmas Tree this year my family was mortified. My youngest daughter wanted to know where the "green" tree was.  I think the silver tree has grown on them and they actually kinda of like it now. The Aluminum Christmas Tree seems to have quite a following this year. I sold every Aluminum Christmas Tree we had this year at the Elk Rapids Antique Warehouse. Even Martha featured her Aluminum Christmas Tree decorated with a wonderful collection of antique and vintage ornaments in the December issue of Living magazine. I love how Martha Stewart can take something like an Aluminum Christmas Tree to a new level of sophistication.  I'm not sure if it's Lucy or Martha to blame for the Aluminum Christmas Tree phenomenon, but I'm a fan.

The Aluminum Christmas Tree


The " Charlie Brown" Christmas Tree.


The History of the Aluminum Christmas Tree

Aluminum Christmas trees were first manufactured in 1958, remained popular during the 1960s, and were manufactured into the 1970s. The trees were first manufactured by a Chicago company called Modern Coatings, Inc. Between 1959 and 1969, the bulk of aluminum Christmas trees were produced in Manitowoc, Wisconsin, by the Aluminum Specialty Company; in that decade the company produced more than one million aluminum trees. At the time they were produced in Manitowoc the trees, including the company's flagship product the "Evergleam", retailed for $25 and wholesaled for $11.25.

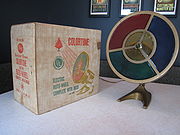
The first aluminum trees could not be illuminated in the manner traditional for natural Christmas trees or other artificial trees. The common method of illumination was a floor-based "color wheel" which was placed under the tree.The color wheel featured varyingly colored segments on a clear plastic wheel, when switched on the wheel rotated and a light shone through the clear plastic casting an array of colors throughout the tree's metallic branches.


"Whether you decorate with blue or red balls . . . or use the tree without ornaments - this exquisite tree is sure to be the talk of your neighborhood. High luster aluminum gives a dazzling brilliance. Shimmering silvery branches are swirled and tapered to a handsome realistic fullness. It's really durable . . needles are glued and mechanically locked on. Fireproof . . you can use it year after year."

- Sears, 1963 Christmas Book


Here some pictures of my Aluminum Christmas Tree.


Merry Christmas to All of You.

Antique Living


Wednesday, December 16, 2009

Candy for Customers

At the shop I like to put a dish of candy out for the customers. Right now we are giving away these candy cane coupons for 10% off your next purchase. I printed our Santa Ad for this year on business cards,  punched a hole and tied on with ribbon. Very quick and easy.
If you cant make it into the Elk Rapids Antique Warehouse before Christmas Eve for your coupon,
e-mail me at antiqueliving@yahoo.com and I will send you one.


I am displaying the candy cane coupons in a glass flower frog set inside a
small milk glass compote in the open lace edge pattern. These compotes come in several sizes. I like to stack them for a bigger impact. Fill each layer with a different kind of candy. Milk glass is a very budget friendly and is fairly easy to find. Milk glass coordinates well with many other colors
and I find its uses very versatile. 


 Here is another example.
I removed the glass flower frog and added a third compote.
Try this for your next party. You can use nuts or small appetizers.
This would also make a great centerpiece with greenery and flowers or
fill them with your cherished ornaments.
Have any Ideas?
Send me an e-mail with your suggestion . 
antiqueliving@yahoo.com


Monday, December 14, 2009

Winter Tablescape

I wanted to share with you a Winter Tablescape I did for the Holiday Season. I was able to create this "Winter Wonderland"  with items I already had on hand. The greenery was the only item I had to find. Lucky for me the Utility company cut back a bunch of large pine trees from the power lines by my home. Free greenery !


For the base I used two glass cylinder vases, one smaller than the other. Place the smaller vase inside the larger vase . Carefully fill the larger vase with the sea glass. I used a large skewer to manipulate the glass pieces to fill in any gaps. You can fill your vase with many different items. You could use candy, cranberries, small ornaments, nuts, the possibilities are endless. I like to use a filler because the greenery stems are not attractive in a clear glass vase. Fill the smaller vase with water and a flower preservative. Be careful not to get water in the larger vase.


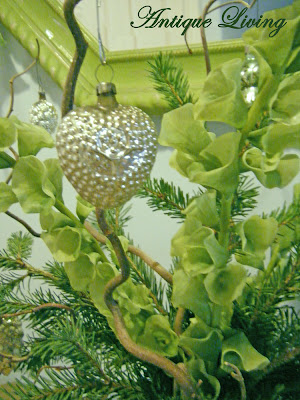
I added to the vase my free greenery, 3 faux stems of Bells of Ireland and curly willow branches. I hung a few of my antique silver and mercury glass ornaments from the curly willow branches for a little sparkle.
I set the vase on top of a found piece of driftwood. Sprinkle the table with faux snow . I added some large pine cones, 3 silver candlesticks and a charming family of vintage celluloid deer.


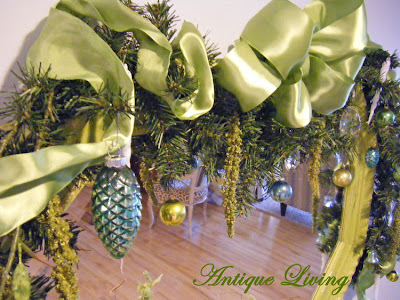
I also decorated the mirror above the tablescape using greenery, ribbon, antique crystals, vintage glass ornaments and faux icicles.


Friday, December 11, 2009

A few of my Favorite Christmas Things

Here are some of my favorite finds from Christmas Past at the Elk Rapids Antique Warehouse.


A milkglass Tom & Jerry punch bowl set.

Tom and Jerry Recipe

1 cup Dark Rum

1 Bottle (750 ml) Brandy
6 Eggs*
2 cups Sugar
4 cups Hot water, milk, or coffee

Separate eggs in two bowls. Add Rum & Brandy to the yolks and beat together until frothy. In the other bowl beat the egg whites until it peaks then add sugar and beat until stiff. Fold into the liquor mixture. Pour into  mugs and top with the water, milk or coffee.

* Please use caution using raw eggs. Always use the freshest eggs possible. If raw eggs are a concern, use an egg substitute product.


A vintage "Glorious Angel " tree topper by Glolite Corporation Chicago, IL.
and
Decorative Metal Fence for your Christmas Tree
Mfd. by Consolidated Sales & Products Chicago, IL.


A Vintage ceramic Christmas Tree. I love the color of this tree .
I'ts not the usual green and red. 


A fantastic set of Blue Ridge Christmas Tree pattern Cups and Saucers.

Blue Ridge dinnerware was produced by Southern Potteries of Erwin, Tennessee, from the late 1930's until 1956 in twelve basic styles and two thousand different patterns, all of which were decorated under the glaze.


Annalee Mobilitee Dolls

What began as a hobby for a young girl named Barbara Annalee Davis, grew into a family business-the business of doll making. A young adult in the 1930's, Annalee created puppets and dolls, unaware that this hobby would become her life's calling. She sold her dolls though various craft outlets in New Hampshire and Massachusetts. From the beginning, her dolls were in set positions, with the clothes sewed onto the doll. These were dolls for display, each with a story to tell.


In 1941 Annalee married Charles "Chip" Thorndike, the son of a Boston physician. Chip had become a chicken farmer in Meredith. Chip and Annalee worked on the farm through the 1940s and 1950s, until poultry farming was no longer profitable in New Hampshire. Needing another way to make a living, Annalee returned to making dolls.

She started in the kitchen of her Meredith farmhouse, helped by local women. Soon every corner of the house was taken over with doll parts. Thorndike not only employed several women in her home, she took work out to be completed in other women's homes. It was her husband Chip created clever wooden components for the dolls, including skis, ski poles, and little boats and it was also Chip who designed the wire frame that held the dolls in position.

The doll business was incorporated in 1955 as Annalee Mobilitee Dolls and the company continued to grow introducing new lines and innovative ideas.


A nice collected set of Vintage  Shiny Brite Ornaments.


The Shiny-Brite company produced the most popular Christmas tree ornaments in the United States throughout the 1940's and '50s.

In 1937, Max Eckhardt established "Shiny-Brite" ornaments, working with the Corning Glass Company to mass produce glass Christmas ornaments. Eckhardt had been importing hand-blown glass balls from Germany since around 1907, but had the foresight to anticipate a disruption in his supply from the upcoming war. Corning adapted their process for making light bulbs to making clear glass ornaments, which were then shipped to Eckhardt's factories to be decorated by hand. The fact that Shiny-Brite ornaments were an American-made product was stressed as a selling point during World War II.

Dating of the ornaments is often facilitated by studying the hook. The first Shiny-Brite ornaments had the traditional metal cap and loop, with the hook attached to the loop, from which the ornament was hung from the tree.

Wartime production necessitated the replacement of the metal cap with a cardboard tab, from which the owner would use yarn or string to hang the ornament. These hangers firmly place the date of manufacture of the ornament to the early 1940's.

Following the war, Shiny-Brite introduced a line of ornaments with a newly designed metal hook that provided the user with two lengths of hanger. The long hook traveled through the center of the ornament and exited the bottom, where it attached to the foot of the ornament. This provided the "short" hanger. Unlatched from the bottom, the entire length of the hook was available, allowing the ornament to dangle at a greater distance from the tree limb to which it was attached. This arrangement was designed to allow the ornament to fill sparsely limbed areas of a natural tree.

The increasing popularity of the aluminum artificial Christmas tree, first manufactured in 1958, made this device far less attractive to the consumer, as an artificial tree had no gaps to be filled. The added expense of the lengthy hanging wire coupled with the diminishing need caused this feature to be discontinued in 1960.

The demand for glass ornaments waned as plastic ornaments became more popular, ultimately bringing the Shiny-Brite company to close its doors in 1962.

During its peak, Shiny-Brite had four factories in New Jersey, located in the cities of Hoboken, Irvington, North Bergen, and West New York. The company's main office and showroom were located at 45 East 17th Street in New York City, NY.

Shiny-Brite's most popular ornaments have been reissued by Christopher Radko since 2001.

From Wikipedia, the free encyclopedia


A selection of aluminum Christmas light reflectors.
I have seen these used for all kinds of fun Christmas projects.


Here is a "new" never used  Vera Christmas tablecloth. This holly leaf design is screen printed
on all belgian linen.

 The designer behind the name was Vera Neumann, an artist turned textile designer. Vera began designing textiles in 1946 after she and her husband, George Neumann founded Printex along with partner Werner Hamm.


They used a small silk-screening machine to print designs onto linen, which Vera then made into placemats. Hamm then took the finished placemats to B. Altman, where he made the company's first sale. In the post- WWII period, army surplus silk which had been used for parachutes, became available at cheap prices. Printex started buying it, and soon they were in the scarf business, making the items in their Manhattan apartment, a loft on 57th Street, where Vera and George handled the entire operation.

The "vera" trademark was first used in 1947. In 1948, the business had out-grown the loft and was moved from Manhattan to Ossining, NY.

By the 1950s business had grown to the point where Vera employed a team of designers. These designers were responsible for taking the original design which was done by Vera herself in the form of a 36" scarf, and translating it into other products.

In the 1960s a clothing line was added to the scarves and household linens. Blouses and dresses were made from the Vera textile designs.

In 1974, Perry Ellis went to work for Vera as a merchandise manager. He asked if he could submit designs for the clothing lines, and Vera encouraged him to do so. She liked his work, and he became a designer for Vera. In 1976 he was given his own division, Portfolio by Perry Ellis for Vera, which he designed for three years before starting his own company.


Wednesday, November 25, 2009

Happy Thanksgiving


I am thankful for the opportunity to share my 
Antique Living Blog with all of you. 

Peace and Plenty
I wish to you
on Thanksgiving Day.

Angelic Esser

Tuesday, November 10, 2009

Favorite Finds

The Antique Living Blog will be sharing with you every now and then some of our favorite finds. Hopefully you too will feel the same adrenaline rush as I do when I find these treasures.

Enjoy!


This is my latest find , a bundle of sweet baby clothes I found at an Estate Sale.

The clothes needed some TLC. After some hand washing, mending and pressing, they were brought back to the original splendor.

This little girls jacket with matching hat is just precious. I wish I had this for one of my girls when they were little. This is a heirloom quality jacket , that could be passed down from generation to generation.


This coat is available for purchase at the Antique Living Etsy shop.


Thursday, October 29, 2009

Recipes from the Past

Many of us enjoy remembering the dietary delights of our youth. A favorite casserole mom used to make for dinner or a luscious cake grandma made every time we came to visit. Antique cookbooks are a great place to find these recipes from the past.

Perhaps you have always wanted to cook a classic French dish such as Coq au Vin. Pick up a copy of” Mastering the Art of French Cooking” by the great Julia Child. Do not feel like preparing a gourmet French meal? Try a simple old-fashioned dessert. The Chicago Culinary Institutes 1940 cookbook “250 Delectable Desserts” swears to “end each meal in triumph! “ The seasonal recipe for New England Pumpkin Pudding is a great recipe for anyone on a gluten-free diet.

Many recipes from the past used fresh local ingredients in season. Just last week my husband, daughter and mother- in- law visited a local orchard to pick apples. The fruits of their labor yielded the best “Paper Bag Apple Pie” I ever had. A vintage recipe from the cookbook “Real, Old-Time Yankee Apple Cooking” insures a “perfect bake every time”.

Not much of a cook? How about a fun retro drink recipe for a swanky cocktail party or a traditional punch for the holidays? A 1933 book “Quiet Drinking “ would serve as a reliable guide for classic cocktails .This book must have earned its title due to being published the same year prohibition was repealed. If you have more formal entertaining to do, many antique cookbooks also included guides on the proper etiquette of entertaining. Since I have the memory similar to a strainer, I am constantly checking these books to see what side of the plate I place the fork, spoon and knife.

Whether you are searching for a casserole like Mom used to make, or a menu for an elegant dinner party, recipes of the past are sure to please the palate and nourish the soul.

Coq Au Vin, a recipe from the cookbook " Mastering the Art of French Cooking " by Julia Child.

2 1/2 to 3 pounds cut-up frying chicken, skin on and thoroughly dried (I used skinless boneless breasts and thighs instead)*
4 ounces lean thick-cut bacon
2 tablespoons olive oil
Salt and pepper
1/4 cup cognac
2 cups red wine (Pinot Noir, Burgundy, Beaujolais or Chianti)
Avoid bold, heavily oaked red wine varietals like Cabernet.
2 cup homemade chicken stock or low-sodium chicken stock or broth
1 tablespoon tomato paste
2 cloves garlic, mashed or minced
1 bay leaf
1/4 teaspoon thyme
Brown-Braised Onions (see recipe below)
Mushrooms (see recipe below)
3 tablespoon all-purpose flour
2 tablespoons butter, softened
Parsley sprigs


Dry chicken thoroughly in a towel. Season chicken with salt and pepper; set aside.

Remove any rind off the bacon and cut the bacon into lardons (rectangles 1/4-inch across and 1-inch long). In a saucepan, simmer the bacon sticks in 2 quarts of water for 10 minutes; remove from heat, drain, rinse in cold water, and pat dry.

In a large heavy frying pan, casserole dish, or electric skillet over medium heat, heat olive oil until moderately hot. Add the bacon and saute slowly until they are lightly browned. Remove bacon to a side dish. Place chicken pieces into the hot oil (not crowding pan), and brown on all sides. Return bacon to the pan, cover pan, and cook slowly for 10 minutes, turning chicken once.

After browning the chicken, uncover pan, pour in the cognac. Flambé by igniting with a lighted match. Let flame a minute, swirling pan by its handle to burn off alcohol; extinguish with pan cover.

Pour the red wine into the pan and add just enough chicken broth to completely cover the chicken pieces. Stir in tomato paste, garlic, bay leaf, and thyme. Bring the liquid to a simmer, then cover pan, and simmer slowly for about 30 minutes or until the chicken meat is tender when pierced with a fork or an instant-read Cooking Thermometer registers 165 degrees F.

While the chicken is cooking, prepare the Brown-Braised Onions and the Mushrooms.

When the chicken is done cooking, remove from the pan to a platter, leaving the cooking liquid in the pan. Increase heat to high and boil the cooking liquid rapidly until approximately 2 cups of liquid remains.

While the liquid is boiling, in a small bowl, blend the 3 tablespoons flour and 2 tablespoons softened butter into a smooth paste; beat the flour/butter mixture into the approximately 2 cups hot cooking liquid with a whisk. Simmer and stir for a minute or two until the sauce has thickened (the result will be a sauce thick enough to lightly coat a spoon - just thick enough to coat the chicken and vegetables lightly). If sauce is too thin, boil down rapidly to concentrate; if sauce is too thick, thin out with additional spoonfuls of chicken stock. Taste the final sauce, adding more salt and pepper if necessary.

Before serving, reheat the onions and mushrooms (if necessary).

Storing: Chicken is now ready for final reheating, but can be set aside in the sauce until cool, then covered and refrigerated for 1 to 2 days. To reheat, simmer slowly, covered, over low heat. Baste and turn chicken every 2 minutes until thoroughly warmed through (6 to 8 minutes). NOTE: Do not overcook chicken at this point.

To serve immediately: Shortly before serving, bring the sauce and the cooked chicken to a simmer, cover and simmer slowly for 4 to 5 minutes, until chicken is hot through. NOTE: Do not overcook chicken at this point.

To serve: Either serve from the casserole dish or arrange the chicken on a large platter. Pour the sauce over the chicken. Arrange the Brown-Braised Onions on one side of the chicken and the Mushrooms on the other side. Decorate with sprigs of parsley.
Makes 4 to 6 servings.

Brown-Braised Onions:
12 to 24 small white onions, peeled (or double the amount if you want to use tiny frozen peeled raw onions)*
1 to 2 tablespoons olive oil
Salt to taste

While chicken is cooking, drop onions into boiling water, bring water back to the boil, and let boil for 1 minute. Remove from heat and drain. Cool onions in ice water. Shave off the two ends (root and stem ends) of each onion, peel carefully, and pierce a deep cross in the root end with a small knife (to keep onions whole during cooking).

In a large frying pan over medium heat, heat the olive oil, add parboiled onions, and toss for several minutes until lightly browned (this will be a patchy brown). Add water to halfway up onions and add 1/4 to1/2 teaspoon salt. Cover pan and simmer slowly for 25 to 30 minutes or until onions are tender when pierce with a knife.

NOTE: Onions may be cooked in advance, set aside, then reheated when needed. Season to taste just before serving.


Mushrooms:
1/2 pound fresh mushrooms, washed, well dried, left whole if small, sliced or quartered if large
1 tablespoon butter
1/2 tablespoon olive oil

Prepare mushrooms. In a large frying pan over medium heat, heat butter and olive oil; when bubbling hot, toss in mushrooms and saute over high heat for 4 to 5 minutes or until lightly browned. Remove from heat.

NOTE: Mushrooms may be cooked in advance, set aside, then reheated when needed. Season to taste just before serving.


New England Pumpkin Pudding

Butter a 1 1/2 qt. casserole dish.

Mix well
3/4 cup firmly packed brown sugar
1 teaspoon cinnamon
3/4 teaspoon salt
1/2 teaspoon nutmeg
1/2 teaspoon ginger
1/4 teaspoon cloves
Blend thoroughly into
2 cups (1 lb can) canned pumpkin
Add and stir in a mixture of
3 eggs, slightly beaten
1 cup heavy cream
3/4 cup milk
Pour pumpkin mixture into casserole.

Bake at 350 F about 1 hour , or until a silver knife comes out clean when inserted halfway between center and edge of pie. Cool slightly.

Decorate top of pudding with Whipped Cream.

Paper-Bag Apple Pie
6 to 7 cups peeled, sliced apples
1 cup sugar
1/2 cup flour + 2 Tbs.
1/2 tsp. nutmeg
unbaked 9-inch pie shell
2 T. lemon juice
1/2 cup softened butter

Combine apple slices, 1/2 cup of the sugar, and 2 tablespoons of the flour;add nutmeg and toss well into mix. Turn into the pie shell and sprinkle with lemon juice. Combine remaining 1/2 cup sugar with the remaining 1/2 cup flour, rub in the butter, and sprinkle the topping evenly over the apples. Place pie in large, heavy paper bag. Fold end over twice and fasten with paper clips. Place bag on cookie sheet. Bake in 425 oven for 1 hour. Split bag open and remove pie to cool.

Serves 6 to 8

This is a delectable pie. The apples will be very tender, the top golden. And somehow the paper bag insures a perfect bake every time.

Try one of these drinks for your next Cocktail Party

Traditional Swedish Christmas Glug
-This will impress your guests and make your house smell wonderful.

16 oz Brandy
16 oz Red Wine (Burgundy or Claret)
16 oz Port Wine
1 Tablespoon finely chopped Orange or Lemon Peel
1/4 pound Cube Sugar
1/4 Pound seedless Raisins
5 Cardamon Seeds
1 Cinnamon Stick
5 Cloves
1/4 Pound Blanched Almonds

Combine the Red wine and Port in saucepan over low heat. Place orange peel, cardamon seeds, cinnamon and cloves in cheesecloth. Tie cheesecloth securely. Place in wine mixture. Simmer for 20 minutes, then remove. Place cubes of sugar in metal strainer. Rest on top of the saucepan. Set Brandy aflame and pour slowly over sugar. As lighted Brandy is poured over sugar, it will carmalize. As an alternative, 1/2 cup of granulated sugar may be dissolved in Wine. Brandy is set aflame and poured into Wine. Serve in heated mugs.

Moscow Mule
This is one of my favorites. The first time I was served this cocktail was in Calumet, MI located in the heart of Copper Country.

1 1/2 Part Vodka
Ginger Beer
1 slice lime

Serve over ice in a chilled copper mug.
Tuesday, June 23, 2009

Something Old, Something New, Something Borrowed, Something Blue

June is the most popular month for weddings. A tradition that was started by the Romans choosing to marry in the month of June to honor Juno, the ancient Roman goddess of marriage.
Just recently, I attended the wedding of a dear family friend. When it came time to buy the wedding gift, I struggled with the tradition of purchasing a gift from the bridal registry. Eliminating the guesswork of what to buy the newlyweds, every bride registers for exactly what she wants or needs.
So what is my dilemma? As I scanned the registry I found many nice gifts, but I knew that back in the antique store I could purchase a similar gift with higher quality and a better price.

Antique stores are the perfect place to find sets of china, silverware, fine linens, crystal, and stemware. I have sold many exceptional sets of china for the price of one place setting from a department store. In addition, I have yet to find linen from a department store that matches the quality of antique linens. The next time you are invited to a bridal shower or June wedding, consider buying a gift from an antique store. I guarantee you will find the perfect wedding present.

I would like to share with you the "perfect" wedding present I found at the
Elk Rapids Antique Warehouse for my friends wedding.


Of course when I found these Tiffany Crystal Candlesticks, I wanted them for myself. I exercised great restraint , knowing the Bride to Be would love them. I added a pair of taper candles from a local candle store, my favorite dinner recipe and the following sentiment on nice card stock all wrapped up in the original tattered Tiffany blue box.

Something Old
-A pair of Tiffany Crystal Candlesticks from an Antique Shop
Something New
-A pair of beeswax taper candles
Something Borrowed
-A favorite recipe for a candlelit dinner
Something Blue
-A woman’s favorite, “Tiffany Blue”

I am happy to tell you the wedding present was a favorite of the newlyweds.

Friday, June 19, 2009

An Elk Rapids High Tea

I had the pleasure once again to design a table for the Antrim County High Tea for Breast Cancer Prevention. As a table designer you create a table design and provide the table settings for 8 guests.

The Antrim County High Tea for Breast Cancer Prevention is a 501(c)(3) non profit organization with a mission to: "provide awareness and education, eligibility screening and initial medical testing for breast cancer. The primary focus will be to assist all individuals living within Antrim County, Michigan who are not otherwise covered by public or private medical programs and whose personal financial capability would discourage preventative testing.”
ACHT began simply driven by two local women who wanted to make a difference in their community. Today they are supported by over 550 individuals and more than 200 local businesses.

Please take a look at the table I designed.


The table setting is a fine bone china from England. The pattern is
"American Beauty" by Royal Albert. This beautiful china was loaned to Antique Living by Carl and Rose Hatfield of Potbelly Antiques. I had the pleasure of choosing a set of china from Carl and Rose's personal collection of 35 sets of china . If you are ever in Grayling, MI stop in and see their Antique Shop,
Potbelly Antiques
4729 N. Down River Road
Call ahead for hours 517-348-8578.

The green depression water glasses are the Colonial Block pattern by the
Hazel Atlas Co. 1934-1937. The glasses were loaned to Antique Living from the personal collection of Marilyn Dork of Miss Marilyn Antiques. Stop by the
Elk Rapids Antique Warehouse to see her charming antique booth.

Many Thanks to both of you for helping me to support the Antrim County High Tea for Breast Cancer Prevention.


Tuesday, June 9, 2009

2nd Saturdays Outdoor Antique Market


I am excited to announce the first Antique Living show. Please join us on 2nd Saturdays this summer for an Outdoor Antique Market at the Elk Rapids Antique Warehouse. Antiques, Vintage Finds and Unique Treasures are waiting for you to discover.

Thursday, May 21, 2009

Long Lost Lilacs

When your in the Antique business, there is always something you wish you would have kept for yourself. As the lilacs begin to bloom in Northern Michigan, I am gently reminded of the lovely lilac dishes are parted with last year. I can only imagine the new owners delight, as she sets her table this spring with the lovely lilac dishes.

Take a look at the pictures. I think you would agree.